Scrivener is the essential tool for novelists, becoming increasingly useful as your project grows in length and complexity. It’s available on Mac and PC, though awkwardly in slightly different versions, but there’s no ChromeOS version or equivalent. This is hardly a surprise, of course – it is ChromeOS, after all – but as I flit between a Windows desktop PC and a super lightweight Chromebook I needed a way to maintain my Scrivener workflow when out and about.
Header photo by Alexa Mazzarello on Unsplash.
First up, make sure you have a backup of your work. You should always do this anyway (here’s how to cheaply and securely backup your stuff) but make sure you do so before trying out the following.
While there’s nothing to stop me from writing into a Google doc and then transferring it into Scrivener when I get back home, it’s not an elegant solution and can cause problems with different versions of the same text. I also wanted to be able to access my Scrivener projects directly so that I could refer to previous chapters, edit existing work and consult my notes.
The problem is that Scrivener uses its own file format, which makes accessing the contents of a project tricky from anything which isn’t Scrivener. And while you technically can rummage about and access any of the component pieces in a project, you don’t want to accidentally break anything.
What you need to do is sync your project to a format which Chromebooks can access.
Stuff you’ll need
Here’s what you need to make this work:
- Scrivener for Windows, of course. The Mac version should work, too, of course, but I don’t have a way of testing it (the Mac version is also more advanced than the current Windows version, at the time of writing).
- A cloud storage account such as Dropbox or Google Drive. I use Google Drive.
- A text editor on your Chromebook which can edit text files. I use something called Caret, and unfortunately Google Docs isn’t an option – more on this in a moment.
- Decent internet access at home and when out and about (eg by using cafe wifi, or tethering to your phone’s data).
Syncing to a folder
Fortunately, Scrivener for Windows includes a feature for syncing the contents of a project to an external folder. This takes specified parts of your project and exports them to new files in a simple format that can be read by pretty much anything. Any changes you subsequently make to those exported files will be detected the next time you start Scrivener, updating the project automatically.
This way you can write in Scrivener when you’re on your PC, then edit specific chapter files elsewhere on something like a Chromebook, and have all those additions and changes automatically show up when you’re back on your main computer.
You can set this up from the file menu, under the ‘Sync’ option:
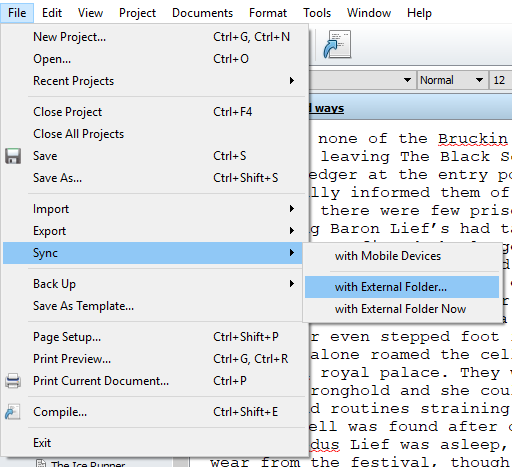
This will then display the options for setting up your folder sync. Here’s how I have mine set up:

If you use Google Drive or Dropbox you’ll already have a local synced version of your cloud storage. When you set up your external folder in Scrivener you want to make sure you locate it inside your cloud storage folder. This way as soon as Scrivener creates the external files they will be automatically uploaded to the cloud., which is how you will then be able to access it from your Chromebook. You don’t need to manually upload them anywhere.
You’ll want to check ‘Sync the contents of the draft folder’, because that’s the main content of your manuscript. The other options are up to you, but I have them all checked:
- Sync all other text documents in the project – this is useful if you have a bunch of research which you want to refer to. This means I can easily access my chapter and plot planning documents.
- Prefix file names with numbers – does what it says, but can be useful for seeing the order of chapters in a file listing, where you won’t automatically get Scrivener’s proper ordered list.
- Take snapshots of affected documents before updating – this is definitely worth checking, in that it will store a ‘snapshot’ of documents before syncing them. This way if anything goes wrong at any point you can revert back to an earlier version.
- Check external files on project open and automatically sync on close – if you don’t activate this option you’ll need to remember to manually sync the folder. I’d highly recommend checking this so that it happens automatically when you open and close Scrivener, which will ensure that everything is always synced and up-to–date without you having to think about it.
The ‘import’ option tells Scrivener what to do about any new files it finds in the external folder which aren’t in the ‘draft’ folder. How useful this is will depend on how frequently you’re going to be generating new non-manuscript content away from Scrivener.
Lastly, under ‘format’ you can pick what kind of file Scrivener will generate. For maximum compatibility I use simple plain text files. This works fine for me because I don’t use much formatting in my manuscript. Even if you’re using plain text files, Scrivener still does a very good job of preserving formatting such as italics and bold between syncs.
Once you’re all set up, you can do an immediate sync or simply save your options. From now on, Scrivener will automatically sync to that external folder on open and close of your project.
Because you’re syncing to your local Dropbox or Google Drive folder, as soon as Scrivener generates those external files they’ll be uploaded to your cloud account.
IMPORTANT NOTE: Never access your externally synced files while your Scrivener project is still open in Scrivener. If you accidentally update both at the same time you could get into a bit of a versioning mess. The appropriate workflow is to only access the externally synced files when Scrivener is closed, and to make sure you save and close your external files before opening Scrivener again.
Accessing the files on a Chromebook
You now need to be able to open and edit your externally synced files on your Chromebook. For this, you need an application which can edit plain text files without changing their format. This unfortunately rules out Google Docs, which automatically converts everything into a new Doc file which then won’t be compatible with Scrivener.
At this point you need a stable internet connection. If you’re out and about, find some wifi or tether to your phone’s data connection.
After some hunting around and trying various options I settled on a Chrome app called Caret. It’s a fully featured text editor which is designed primarily for programmers but which works just fine for us writers, too. You can download it from the Chrome app store here.
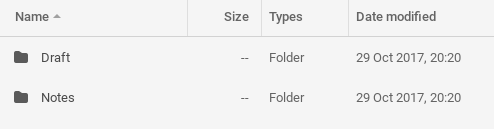
You’ll find that Scrivener has created a couple of folders: a draft folder, containing your manuscript, and a notes folder containing your research:
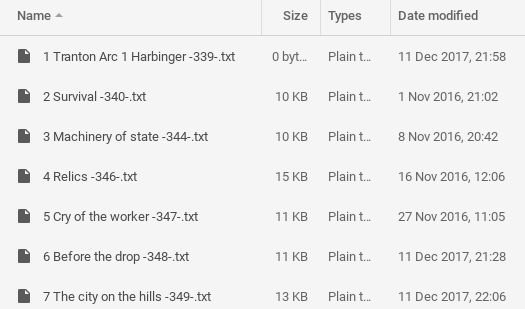
Inside the draft folder you’ll see all your manuscript chapters, handily numbered:
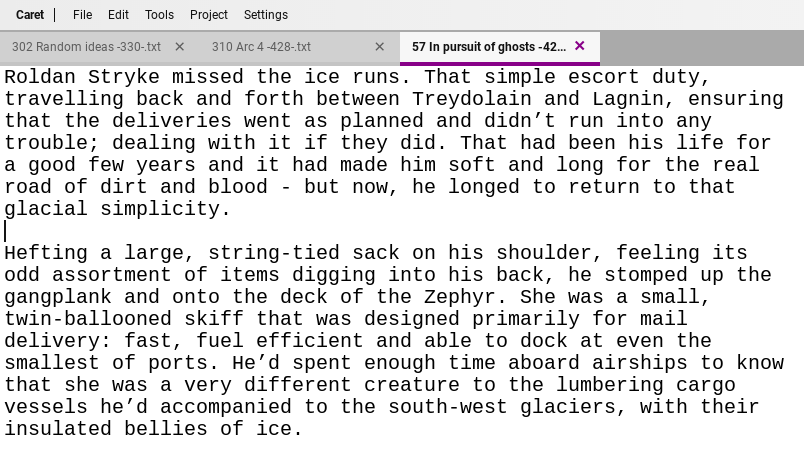
An advantage of Caret is that it provides a very clean, bare bones editor free from distractions. You can open your externally synced Scrivener files direct from your Google Drive folder, continue writing happily on your Chromebook, and then save them back to your Drive. Caret can also open multiple documents at the same time, which is useful for referring to notes while writing a chapter.
Completing the loop
After editing and saving files on your Chromebook they will sync back up to the cloud. The next time you start up you Windows PC to work in Scrivener it’s important to let your local Drive folder finish syncing before starting Scrivener, so that it has the latest versions of the external files.
When you open your project in Scrivener it will automatically check for changes and you’ll see something like this:

NOTE: Scrivener will sometimes detect changes even if you haven’t changed anything. I’m not sure why this is, though it’s probably due to Google Drive making a minor timestamp update even if the contents of the file haven’t changed at all. I’ve not encountered any adverse effects from this.
After syncing you’ll then get this message:
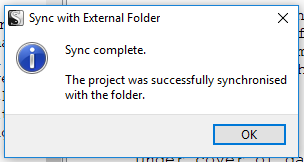
And that completes the round-trip workflow from the Windows version of Scrivener onto a Chromebook and back. This makes it very easy to write on your laptop or from a machine that doesn’t have Scrivener, without having to abandon your main Scrivener workflow. After this initial setup it’s then very fast and effortless to use the workflow.
One day ChromeOS might be able to handle this kind of thing more directly, but until then hopefully this blog post will be of use! I’ll be putting up more Scrivener tips soon, so do jump on the mailing list if you want to be notified.

16 Comments
Nilsa Rivera · February 23, 2018 at 11:27 am
Thank you for sharing. I find the Chromebook so efficient except for the fact that it doesn’t run Scrivener and I have all my files in Scrivener. I was dreading having to install Linux but you’ve provided a quick and simple alternative. Does it continue to work smoothly for you?
Simon Jones · February 23, 2018 at 2:22 pm
I’ve been using this method for over a year now (got my Chromebook around the start of 2017, I think) and haven’t run into any problems. The important thing is to make sure you save and close when you’re done, before opening up on the other machine, and to make sure that Drive/Dropbox has completed syncing, so that you don’t run into any conflicts.
You can even create new documents in Caret, save them into the ‘Draft’ folder and Scrivener will then auto-import it as a new chapter the next time you open it.
E.W. Storch · April 13, 2018 at 2:47 pm
Wow! I just got ahold of a Chromebook because I like the idea of carrying around a smaller machine and I was concerned about not being able to use Scrivener. Your article was a life saver! Thank you so much for posting.
Simon Jones · April 13, 2018 at 2:54 pm
My pleasure! They’re great little machines but do have some gaps. Fortunately this method means we don’t have to abandon Scrivener!
Kris James · August 7, 2018 at 3:06 am
If you have the Windows licensed version of Scrivener you can run Scrivener directly on a a Chromebook using CrossOver. For the time being you can get CrossOver for free since it’s still in Beta. Here are some links to it.
https://www.codeweavers.com/compatibility/crossover/scrivener
http://www.literatureandlatte.com/forum/viewtopic.php?t=51291
https://play.google.com/store/apps/details?id=com.codeweavers.cxoffice
Simon Jones · August 7, 2018 at 7:59 am
Very interesting! I hadn’t heard of Crossover until your reply. I will definitely be investigating further….
Simon Jones · August 7, 2018 at 8:16 am
Alas, my particular Chromebook isn’t compatible with it (lack of Intel processor, I imagine), but it’ll hopefully be useful for other people.
Kris James · August 7, 2018 at 5:40 pm
Sorry to hear that Simon, I wasn’t aware of this limitation. Hopefully this will be useful to others who have compatible Chromebook hardware.
Simon C · September 13, 2018 at 12:10 pm
My wife just got me a Chromebook and this article is very helpful. I love the
lightweight feel to it. But I was worried that I would have to abandon using Scrivener for my writing.
Simon Jones · September 13, 2018 at 10:33 pm
Glad to have helped! I had a similar concern until I started using Caret and the sync feature.
Robert E. Cox · December 10, 2018 at 7:48 pm
Simon: Many thanks for this. If everybody provided such clear how-to instructions, the average blood pressure of humanity would decline by 10 points. Excellent stuff! (p.s. My request to get your newsletter tells me my address is already signed up. I don’t think I’ve seen anything recently — is it published only occasionally?
Simon Jones · December 11, 2018 at 11:29 am
Ha, thank you! Glad to help. I just checked the newsletter stats and you’re definitely on the list and it looks like you opened the newsletter at the start of December. I usually only tend to send once a month, a) so I don’t annoy people and b) because I find it hard enough finding the time to write just one. 🙂
Dave · March 11, 2019 at 3:42 pm
Thank you for sharing this info. I have been contemplating buying a chrome book specifically and only for writing purposes. Your info has helped me take another big step in that direction.
Matthew · June 10, 2020 at 3:15 pm
This is excellent. Very clever and beautifully explained. Thank you.
Simon Jones · July 1, 2020 at 8:12 am
Thanks! Glad to help.